How to Use a Weber Pizza Stone (Detailed Instructions)
Pizza can bring friends and family together in a meaningful way, and one of the most important factors determining how well it turns out is how you heat your pizza.
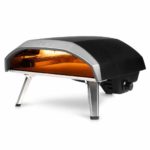
If you want to get that perfectly cooked crust with golden-brown bubbly cheese topping just like your favourite pizzeria makes, then using a Weber pizza stone is an easy way to up your homemade pizza game.
With its unique properties allowing for even heating of the dough and targeted heat distribution, this tool can give you great results with minimal fuss. In this blog post, I’m going to show you why using a Weber pizza stone will help make perfect pies at home every time!
Weber pizza stone instructions (a step-by-step guide)
Using a Weber pizza stone to bake crisp pizzas is easy, and it requires just a few simple steps. Here is how I usually do it, and I want to share the steps with you.
- – First, place your pizza stone on your hot barbecue and allow it to heat through. Close the lid, this should take about 10 minutes. While the stone is warming up, start prepping your pizza by adding desired toppings or ingredients.
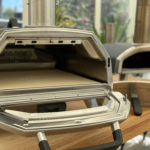
- – Once the stone is heated, carefully remove the lid and use an oven mitt to carefully take the baking tray with the pizza and place it centrally on the hot pizza stone. Again close the lid so that heat can evenly distribute through the pizza.
- – Cooking time will vary depending on your desired temperature for your pizzas; typically pizzas should be cooked for around 8-10 minutes at a medium heat of around 230-260ºC (450-500ºF). However, as every barbecue is different and you may want different temperatures for different types of pizzas you make, keep an eye on it during cooking time to ensure it cooks quickly but doesn’t burn.
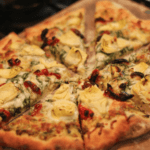
- – Once cooked through remove the baking tray from the Weber pizza stone using an oven mitt and enjoy. The stone also makes a great tool for baking delicious bread too. You just need to simply follow the same steps as I’ve shared.
How to prepare your ingredients before baking with it
Preparing your ingredients before baking with a Weber pizza stone is easy and straightforward. First, if you’re using pre-made dough, make sure to bring it up to room temperature before rolling it out.
This will help the dough to be more elastic so that it won’t shrink while baking. If you’re making your own dough from scratch, mix together your dry ingredients first and then slowly add in your wet ingredients until the desired consistency is achieved. Once you’ve made the dough, cover it with plastic wrap and allow it to rise for at least an hour or two.
Once the dough is ready, lightly flour your work surface and roll out the dough into a large circle. Use a knife or pizza cutter to trim off any excess edges. Carefully place your pizza onto the heated Weber stone and top with desired toppings like sauce, cheese, veggies, and/or meat. The key here is not to overload the pizza as this can affect how quickly it cooks – less is more!
Finally, close the lid of your Weber grill and let cook for approximately 8 minutes or until golden brown on top. To ensure an evenly cooked crust, rotate the pizza throughout cooking so that different sections are exposed to direct heat from the burner beneath. And that’s all there is to it!

Tips on how to get perfectly cooked crusts every time
Cooking perfect pizza crusts every time with a Weber pizza stone is easier than you think! Here are some tips to help you get the perfect crisp and delicious pizza crust every single time:
- – Make sure the stone is pre-heated before you put your pizza in – this will ensure that your crust gets perfectly browned and crispy. Preheat your Weber pizza stone to 350°F for 15 minutes, or until the surface is hot to the touch.
- – Use a baking sheet or lightly oiled parchment paper to make sure your dough doesn’t stick to the stone.
- – Make sure you use enough flour when rolling out the dough – this will help create a nice chewy texture on the bottom of your crust. And if you don’t want too much crunch, roll out thinner pizzas rather than thick-crust ones as they’ll take longer to cook.
- – Start off cooking with indirect heat on your Weber grill – this will give your crust more even cooking without burning it. If after 10 minutes, you’re not getting enough heat, move it direct and increase the temperature of the grill by 25°F-50°F, keeping an eye on it so it doesn’t burn!
- – When removing from the grill, use a large flat spatula to slide underneath and transfer onto a cutting board for slicing up.
How to wash and clean your Weber pizza stone?
Let me tell you how I wash and clean mine, so you can be prepared to maintain yours in tip-top shape.
First off, it’s essential to remember never to use soap, detergents, or any cleaning chemicals on your pizza stone. The porous nature of the stone means it absorbs everything, and you don’t want a soapy taste next time you cook a pizza, right? Plus, avoid submerging the stone in water because that can weaken it and eventually cause it to crack.
Once you’ve finished cooking and enjoyed that scrumptious pizza, let the stone cool down completely. And, I mean completely – this is important to avoid any thermal shock that might lead to cracks. To speed up the cooling process, you can leave the stone in a safe, open area or on the grill itself with the lid up.
After the stone has cooled, grab a spatula or a dough scraper to remove any bits of food residue or debris. This step is relatively easy, as the surface of the stone is rather non-stick due to its porous nature. However, be gentle and avoid using metal tools that could scratch the stone.
If you still have some tougher spots to clean, you can use a soft-bristle brush or an abrasive sponge to scrub gently. Make sure not to be too rough, as you don’t want to damage the stone.
For any stubborn stains, dampen a cloth with water and wring it out well – it should be just about moist, not dripping. Then, use that cloth to apply a little elbow grease and rub away the stains. Sometimes, baking soda works wonders for helping get off those nasty stains – just sprinkle a little on the wet cloth and scrub carefully.
Finally, let the stone dry completely before storing it or using it again. Give it plenty of air circulation, and you’ll be all set for your next pizza-making adventure in no time.
Conclusion
Treat yourself to the incomparable taste of classic bubbly cheese and perfectly browned crust by using a Weber pizza stone for your next homemade pizza. With just a few simple steps, you can have delicious results in minutes!
Don’t pass up this incredible opportunity – give it a try and experience mouthwatering pizzas that will make you glad you did!